| AVS TV Box |
Send comments on this topic. |
|
Working with AVS TV Box | ||
Capturing and Recording
You can start recording the video just clicking the Record button on the main controls panel. After that the recording will start and you will be able to stop it pressing the Stop button or pause with the appropriate button.
But usually it is more convenient to use the scheduler option to record the video.
Using the scheduler to record the files
You can open the scheduling window using the express menu.
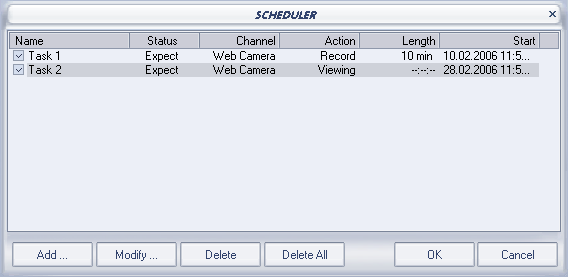
There are six buttons in this window:
| Add... | - Use this button to add a new scheduling task. See below for details on how to add a new task |
| Modify... | - Use this button to modify the currently selected task |
| Delete | - Use this button to delete the currently selected task |
| Delete All | - Use this button to delete all the scheduled tasks from the list |
| OK | - Use this button to accept all the changes you have made and close this window |
| Cancel | - Use this button to discard all the changes you have made and close this window |
The heading of the window consists of the following items:
| Name | - The name of the scheduled task. By default will be Task 1, Task 2 and so on |
| Status | - The current status of the scheduled task |
| Channel | - The channel used as the scheduled task source |
| Action | - The action to be taken within the scheduled task |
| Length | - The duration of the scheduled task in minutes |
| Start | - The start time - date and time - of the scheduled task |
All these parameters can be set when you press either Add... or Modify... button. The following window will open:
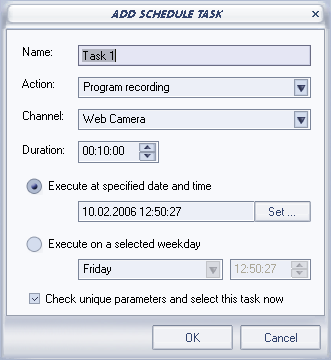
You can also select a weekday instead of the date to set the task. To avoid the repetition of the same task for several times you can tic the Check unique parameters and select this task now check-box.
Click the OK button to accept all the changes or Cancel to discard all the changes and close the Add Schedule Task window.
When you press the Snapshot button on the main controls panel the Snapshots window will open with the images of the taken snapshots. You can use the following options to manage your snapshots:
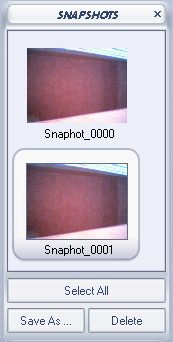 |
Select All | - Use this button to select all the taken snapshots and either save them in the supported image formats or delete |
| Save As... | - Use this button to save the selected snapshots into one of the supported formats. See below on the main formats supported and their settings | |
| Delete | - Use this button to remove the selected snapshots from the list |
When you press the Save As... button the following window will let you modify the image file and format properties:
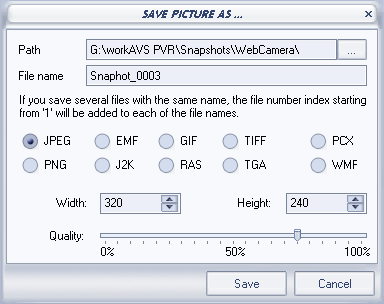
| Path | - The path to the file on your computer hard disk drive |
| File name | - The name that will be assigned to the image file to distinguish it from the other image files on your computer. If you selected several snapshots at once, all of them will be saved with the same name that you select and to distinguish them their consecutive number will be added to the file name, starting with 1 (e.g. my_file_1, my_file_2 and so on) |
| File format | - The format used to save the image file. You can select among different image file formats depending on your needs |
| Additional format settings | - You can set some additional image format parameters, varying depending on the format |
Press the Save button to save the file with the selected parameters onto your computer hard disk drive or Cancel to abort the file saving process.
© 2006 Online Media Technologies Ltd., London, UK. All rights reserved.